
 Français
  Deutsch
  Italiano
  Español
  Русский
  Română
 Introduction
Zippy stands as a robust file versioning and backup system, engineered for professionals, creatives, and anyone who values the integrity of their digital work. It streamlines the creation of incremental backups, offers clear tracking of modifications between versions, and allows for the straightforward restoration of previous project states.
Key Benefits of Using Zippy:
- Effortless Version Control: Generate versioned backups of your projects, complete with detailed notes, without requiring specialized technical knowledge.
- Comprehensive Change Tracking: Gain clear visibility into which files have been added, modified, or deleted between different versions of your project.
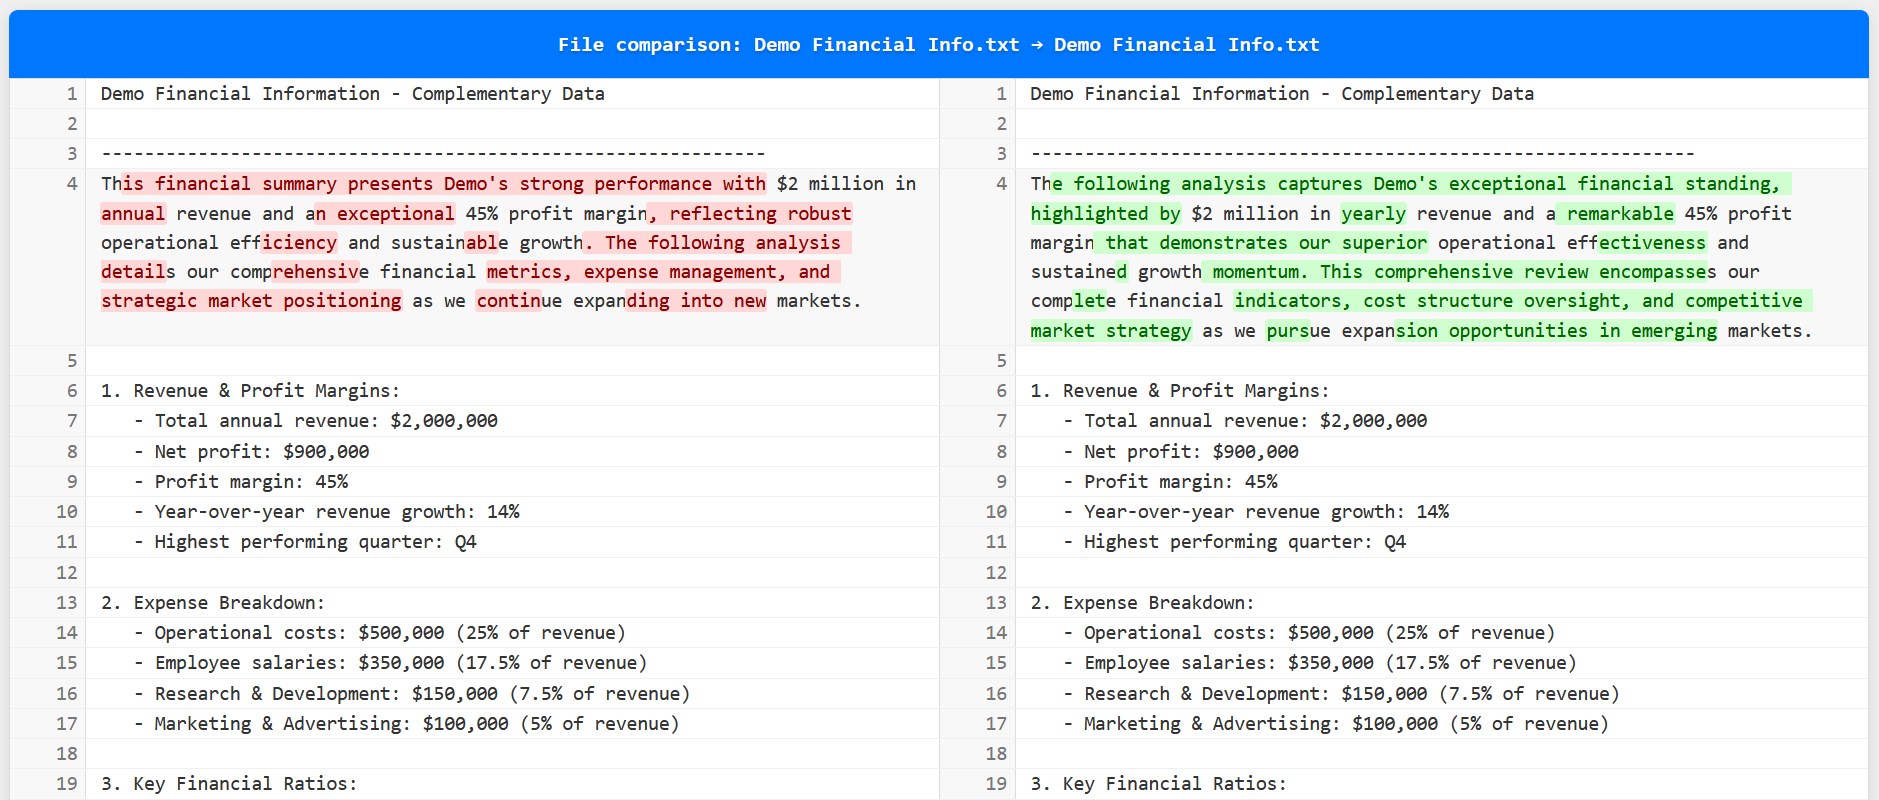
- Insightful Visual Diffs: For text-based files, Zippy produces visual comparisons, meticulously highlighting changes side-by-side and even character-by-character.
- Reliable Restore Capabilities: Easily and confidently revert your entire project to any previously saved version.
- Customizable Configuration: Tailor Zippy's behavior by defining precisely which files and folders should be included or excluded from the backup process.
- Unyielding Data Integrity: Zippy employs mechanisms to ensure your backups are complete and that your valuable data remains securely stored on your local PC.
- Constant Accessibility: Zippy's user interface is designed to remain "always on top" of other windows, ensuring it's readily available whenever you need it.
- Zero-Administrator Installation: Zippy installs entirely within your user space, meaning no administrator privileges are required, making it ideal for restricted environments.
- Multilingual Support: Zippy is accessible to a global audience, with its interface and documentation available in English, French, Italian, Spanish, German, Russian and Romanian.
Zippy offers a refined and simplified approach to version control, empowering you to concentrate on your creative and professional endeavors while it diligently manages the safety net for your work.
Getting started
This section will guide you through installing Zippy and setting up your first project.
Installation process
Installing Zippy is a quick and straightforward process:
-
Run the Installer: Locate the
zippy-1.x.x-x64.exeinstaller file you downloaded and double-click it to begin the installation. -
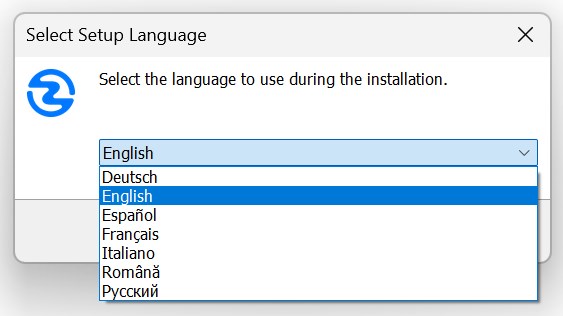
Select Your Language: From the dropdown menu presented, choose your preferred language for the Zippy interface and documentation.
- English
- French (Français)
- Italian (Italiano)
- Spanish (Español)
- German (Deutsch)
- Russian (Русский)
- Romanian (Română)
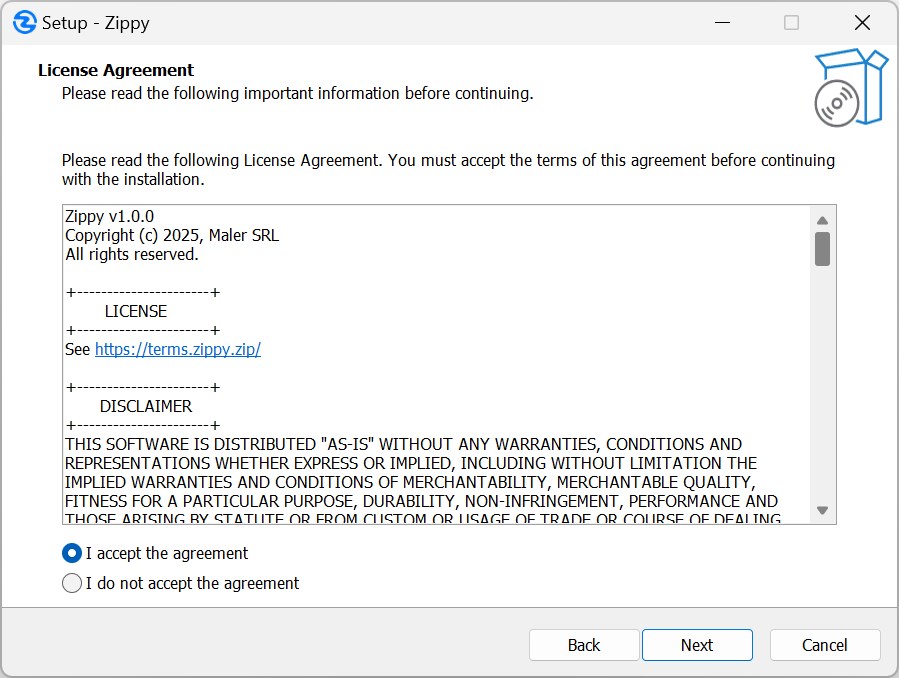
- Accept License Agreement: Carefully read the terms of the license agreement. To continue with the installation, you must select the "I accept the agreement" option and then click "Next."
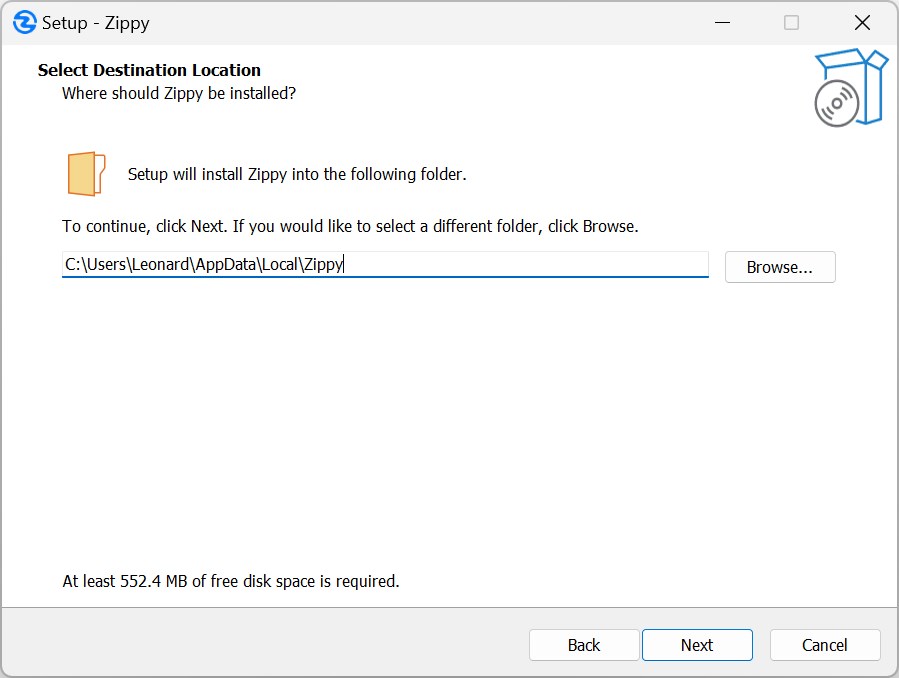
- Choose Installation Location: Zippy defaults to installing in your local app data folder. This location does not require special administrator privileges and is generally recommended. Click "Next" to accept the default or choose an alternative location if necessary.
- Begin Installation: Click the "Install" button. The installer will then proceed to copy all necessary files to your computer.
- Complete Installation: Once the file copying process is finished, click the "Finish" button to exit the installer. Zippy is now installed.
Initial project setup
Once Zippy is installed, it seamlessly integrates into your Windows operating system:
- Launch Zippy for a Folder: Navigate to the folder you wish to manage with Zippy using Windows File Explorer. Right-click within an empty space inside the folder. From the context menu that appears, select "Start Zippy Here."

-
Select Version Type: You will be prompted to choose between two versions of Zippy:
- Trial Version: This version is free to use and allows for an unlimited number of projects, but each project is limited to 10 backups.
- Licensed Version: This version requires a purchased license key and allows for up to 9999 backups per project, also supporting an unlimited number of projects. If you choose "Licensed Version," you will be prompted to enter your license key.
-
Define Project Name:
- Enter a descriptive name for your project. This name has a maximum length of 25 characters.
- The project name will be displayed at the top of the Zippy interface and will also be used in the creation of the project-specific folder.
Upon completing these steps, Zippy will establish the necessary file and folder structure within the location where you initiated it:
[your-project-name]-zippyFolder: This is your primary working folder. Crucially, all files that you want Zippy to manage, track, and back up must be placed and edited within this specific folder.backup-zippyFolder: This dedicated folder is where Zippy will store all your versioned backups.zippy.dbFile: This is a database file containing essential metadata and information about your project's versions. It is critical that you do not delete this file, as it's vital for Zippy's operation.ZippyShortcut: A convenient shortcut file is created, allowing you to quickly relaunch the Zippy interface for this particular project in the future.
Zippy allows you to create and manage multiple distinct projects on your computer, and you can work with several Zippy instances simultaneously if needed.
Main interface overview
Zippy's main interface is intentionally designed for simplicity, ease of use, and continuous accessibility. A key feature is that it always remains "on top" of other application windows, ensuring it's instantly available when you need to perform a backup or restore.
The interface consists of the following key elements:
-
Project Name Display: Prominently shown at the top of the window.
-
Backup Button: Clicking this button initiates the process of creating a new backup version, capturing the current state of your project files.
-
Restore Button: This button opens the restore view, where you can browse through previous versions of your project and choose one to restore.
-
Current Version Number: Located typically in the bottom-right corner, this number indicates the version of the backup that your current working files are based on. It essentially signifies the "parent" version for your next backup.
-
Options Menu (⠿ icon): Located at the bottom-center of the window, directly beneath the Restore button, this menu provides access to a range of additional features and settings:
- Manage Exclusion Patterns
- Manage File Extensions (Text vs. Binary extensions)
- Register Zippy (if you are using the Trial version) / Deactivate License (if you are using the Licensed version)
- Report a Bug
- Access the Online User Guide
- View "About Zippy" information
Backup workflow
The process of creating a backup in Zippy is designed to be straightforward, capturing a snapshot of your project files located within the [your-project-name]-zippy working folder.
-
Initiate Backup: Click the prominent "Backup" button on Zippy's main interface.
-
Change Detection: Zippy will immediately scan your project folder (
[your-project-name]-zippy) to identify any changes made since the last backup (or since the project was created, if it's the first backup). It specifically looks for:- Files that have been newly added to the project.
- Files that have been modified.
- Files that have been deleted from the project.
-
Enter Version Notes: If Zippy detects any changes, a dialog box will appear. This prompts you to enter descriptive notes for the version you are about to create. These notes are invaluable for future reference, helping you (and potentially others) understand the purpose, scope, and key changes encapsulated in this particular backup. Well-written notes significantly enhance the usability of your version history.
-
Backup Creation Process: After you've entered your notes and clicked "OK", Zippy begins the backup creation. A progress dialog will be displayed during the backup process:
-
A new, sequentially numbered folder (e.g.,
0001,0002, etc.) is created within thebackup-zippyfolder. Each backup gets its own distinct folder. -
Zippy generates a compressed ZIP archive containing your entire project folder's contents (respecting any exclusion patterns you've defined). This ZIP file represents a complete snapshot of your project at that moment.
-
Comprehensive HTML documentation is created and stored alongside the ZIP file within the version's folder:
notes.html: An HTML file containing the descriptive notes you entered for this specific version.changelog.html: An HTML file that details all files added, modified, or deleted in this version. It also includes a timeline or history of all project versions.
-
For any text-based files (as defined in "Manage File Extensions") that were modified, Zippy generates visual HTML "diff" files. These files have an
.htmextension and provide a side-by-side comparison, highlighting the exact changes made to the content. -
The central
zippy.dbdatabase file is updated with metadata and information about this newly created version. -
An integrity check is performed on the generated ZIP file to ensure it's valid and not corrupted.
-
-
Backup Completion: Once all these steps are successfully completed, Zippy will display a success message. The version number displayed in the main interface will also update to reflect the number of the backup you just created.
Important Note for Trial Version Users: If you are using the trial version of Zippy, please be aware that it has a limit of 10 backups per project. If you attempt to create an 11th backup, Zippy will remind you of this limitation and will suggest purchasing a license to continue backing up that project.
Restore workflow
Restoring a project in Zippy allows you to revert your working files to the state they were in at the time of a previous backup. This is a powerful feature for recovering from errors, exploring past ideas, or undoing unwanted changes.
Crucial Prerequisite: Before initiating any restore operation, it is imperative that you close all files from your project folder ([your-project-name]-zippy) that might be open in other applications (e.g., text editors, image viewers, IDEs). Zippy needs to delete and replace files in your working folder, and locked files can cause the restore process to fail. If you have current, un-backed-up changes in your working folder that you wish to keep, create a new backup of the current state before proceeding with the restore.
-
Initiate Restore: Click the "Restore" button on Zippy's main interface.
-
Version Selection Interface: The restore interface will appear, providing a comprehensive view of your project's backup history:
-
Left Panel (Version List): This panel displays a list of all available backup version numbers for the current project. The newest (most recent) versions are listed first.
-
Right Panel (Version Details): When you select a version number from the left panel, this panel updates to show detailed information about that specific backup:
- User Notes: The descriptive notes you entered when that version was created.
- Release Information: A summary of changes in that version, such as lists of files added, modified, or deleted and includes a timeline or history of all project versions.
- File Diffs Viewer: A dropdown menu or list that allows you to select and view the specific HTML diff files (
.htm) for any text files that were modified in that version. You can open these diffs directly from this interface to examine the exact changes.
-
-
Confirm Restore Operation:
- Carefully select the desired backup version from the list in the left panel.
- Once you are sure, click the "Restore" button within this restore view.
- Zippy will display a final confirmation dialog, reminding you again to ensure all project files are closed.
-
Restore Process Execution: After your confirmation, Zippy undertakes the following steps:
- Safety Backup: As a precautionary measure, Zippy first creates a temporary backup (as a ZIP file) of your project's current state before making any changes. This is for recovery purposes if the restore itself fails.
- Disk Space Check: Zippy checks if there is sufficient free disk space to perform the restore operation.
- Clear Project Folder: Zippy will then proceed to clear the contents of your main project folder (
[your-project-name]-zippy).- Important Note on Exclusions: Files and folders within your project folder that match your defined exclusion patterns will be preserved and left untouched during this clearing process.
- Extract Selected Version: The contents of the ZIP archive from the selected backup version are extracted into your now-cleared project folder.
- Database Update: The
zippy.dbdatabase is updated to reflect that your project's working state is now based on the version you just restored.
-
Restore Completion: Upon successful completion of the restore process, Zippy will display a success message. The version number shown on the main interface will update to match the number of the version you restored. Your project folder now reflects the state of that chosen backup.
Recovery process (after failed restore)
Zippy is designed with a robust recovery mechanism to handle situations where a restore operation might fail. Failures can occur for various reasons, such as files being locked by other applications, insufficient user permissions, or a lack of disk space.
-
Automatic Temporary Backup (Pre-Restore): As detailed in the Restore Workflow, Zippy proactively creates a temporary backup of your project's current state before it even begins the actual restore process. This temporary backup is the cornerstone of the recovery feature.
-
Error Detection During Restore: If, during the restore attempt (e.g., while trying to delete old files or extract new ones), Zippy encounters an error that prevents it from completing successfully, it will halt the restore operation.
-
Automatic Recovery Attempt:
- Zippy will display an error message providing details about what went wrong during the restore.
- Following this, it will automatically attempt to recover your project, aiming to return it to the exact state it was in before you initiated the failed restore. This is done by using the temporary safety backup created in step 1.
- A progress dialog will be shown during this automatic recovery process.
-
Recovery Outcome Assessment:
- Successful Recovery: If the automatic recovery is successful, Zippy will inform you that your project has been restored to its pre-restore state. You can then investigate and resolve the cause of the initial restore failure (e.g., close locked files, free up disk space) and attempt the restore again if desired.
- Partial Recovery: In some instances, the automatic recovery might only be partially successful. If certain files could not be restored from the temporary backup, Zippy may provide a list of these problematic files.
- Recovery Failure (Manual Intervention Required): In the rare event that the automatic recovery process itself fails, Zippy is designed to preserve the temporary safety backup. This backup will be saved with a distinctive name (e.g.,
manual-recovery-YYYYMMDD-HHMMSS.zip) in your project'sbackup-zippyfolder. You can then attempt to manually extract files from this ZIP archive to recover your project's state.
This multi-layered recovery system is crucial for ensuring that even if a restore operation encounters issues, your project is not left in an inconsistent, unusable, or partially restored state.
Branching in Zippy
Zippy incorporates a simple yet effective implicit branching model. This allows you to explore different development paths or variations of your project without losing the history of your main line of work or other experimental branches.
-
Linear Progression (Default): Under normal circumstances, as you create sequential backups, they form a single, linear timeline of your project's evolution. For example:
0001→0002→0003→0004→0005. -
Creating a Branch (Implicitly): Branching in Zippy occurs automatically based on your actions:
- First, you restore your project to an earlier version from your existing timeline (e.g., you restore your project to version
0002). - Next, after making changes to this restored version
0002, you create a new backup. - Zippy will assign the next available sequential version number from its global counter to this new backup (e.g., if
0005was the last version created anywhere, this new backup will become0006). This action effectively creates a new branch diverging from version0002.
- First, you restore your project to an earlier version from your existing timeline (e.g., you restore your project to version
-
Managing Multiple Timelines: After such an operation, your project will have multiple distinct timelines or branches:
- The original timeline:
0001→0002→0003→0004→0005 - The new branch:
0001→0002→0006(and if you continue working on this branch, subsequent backups like0007,0008will extend it).
- The original timeline:
-
Snapshot-Based System: It's important to understand that each version number (e.g.,
0001,0003,0006) represents a complete, independent snapshot of your entire project folder as it existed at that specific point in time (excluding, of course, any files or folders defined in your exclusion patterns). The branching relationship between these snapshots is managed virtually by Zippy and recorded in its metadata. -
Changelog Tracking of Branches: The
changelog.htmlfile, which is included with each backup version, plays a crucial role in understanding branches. This file maintains comprehensive timeline information, allowing you to visualize how different versions relate to each other and to identify which branch a particular version belongs to. -
Flexible Restoration Across Branches: Zippy offers complete freedom in restoration. You can restore to any backup version at any time, regardless of which branch it belongs to or what your current project's version is. This means you can seamlessly move backward and forward across different branches and timelines.
Zippy's branching system provides a safe and straightforward way to experiment with different ideas or manage project variations, all while maintaining a complete and accessible history of your project's entire evolution across all explored paths.
Configuration options
Zippy provides several configuration options to tailor its behavior to your specific needs. These are accessed via the Options Menu (⠿ icon) in the main Zippy interface.
Managing exclusion patterns
Exclusion patterns are a powerful feature that allows you to instruct Zippy to ignore specific files and folders during its backup and restore operations. Items that match an active exclusion pattern are:
- Not included in backup ZIP archives.
- Not tracked for changes (added, modified, deleted).
- Left untouched in your working project folder during a restore operation (they are neither deleted nor overwritten).
- Accessing Exclusion Patterns: Click the Options Menu (⠿) on the main interface and select "Manage Exclusion Patterns."
- Exclusion Patterns Dialog: A dialog box will appear. This dialog displays any currently active exclusion patterns for the project and provides an interface for you to add new ones.
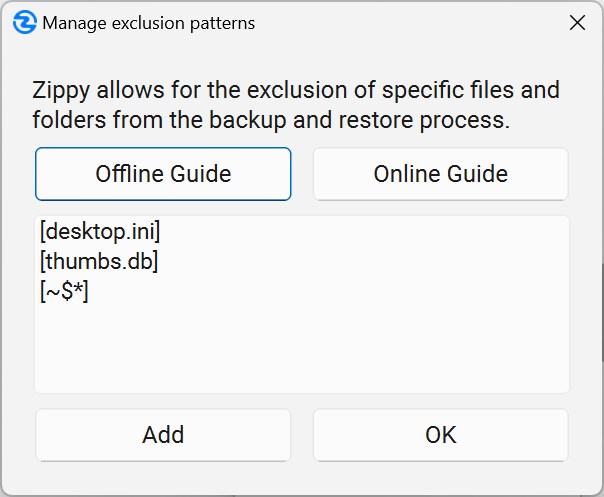
Key Characteristics of Zippy Exclusion Patterns:
- Immutability: This is a critical design aspect of Zippy. Once an exclusion pattern is added to a project, it cannot be modified or subsequently removed. This immutability ensures data integrity and consistent exclusion rules across the entire lifespan and backup history of that specific project. It prevents potential data loss or inconsistencies during restore operations that could arise if exclusion rules were allowed to change over time.
- Initial Setup Recommendation: Due to their immutable nature, it is highly recommended that you carefully consider and define your exclusion patterns when you first create a Zippy project, or at least very early in its lifecycle, before many backups have been made.
How to Specify Exclusion Patterns:
Patterns define what to exclude. Zippy supports the following types of patterns:
1. Global Extension Excludes all files with a specific extension, regardless of their location within the project.
-
Pattern:
[*.ext] -
Examples:
[*.tmp](Excludes all files ending with.tmp)[*.log](Excludes all files ending with.log)[*.bak](Excludes all files ending with.bak)
2. Path-Specific File Excludes a single, specific file located at a precise path within the project.
-
Pattern:
path/to/file.ext(Use forward slashes for path separators) -
Examples:
config/user_settings.ini(Excludes onlyuser_settings.inifound in theconfigfolder at the project root)readme.txt(Excludes onlyreadme.txtfound in the project root folder)
3. Global File Excludes any file with a specific name, regardless of the folder it resides in.
-
Pattern:
[filename.ext] -
Examples:
[debug.log](Excludes any file nameddebug.logfound in any folder within the project)[notes.txt](Excludes any file namednotes.txtfound in any folder)
4. Path-Specific Folder Excludes a specific folder and all of its contents, located at a precise path within the project.
-
Pattern:
path/to/folder/(Trailing slash is important) -
Examples:
build_outputs/(Excludes thebuild_outputsfolder in the project root and everything inside it)src/temp_files/(Excludes thetemp_filesfolder located inside thesrcfolder, and all its contents)
5. Global Folder Excludes any folder with a specified name, at any level within the project structure.
-
Pattern:
[foldername] -
Examples:
[temp](Excludes any folder namedtemp, wherever it might be found in the project)[cache](Excludes any folder namedcacheat any location inside the project folder)
6. Global Filename Prefix Excludes all files whose names start with a specified prefix, regardless of their location.
-
Pattern:
[prefix*](The asterisk acts as a wildcard for characters following the prefix) -
Examples:
[~$*](Commonly used to exclude Microsoft Office temporary files, e.g.,~$document.docx)[WIP_*](Excludes files starting withWIP_, likeWIP_report.txt)
Default Exclusion Patterns: Zippy comes pre-configured with a set of default exclusion patterns to ignore common system or temporary files. These include:
[desktop.ini][Thumbs.db][~$*](for Microsoft Office temporary files)
Case Sensitivity in Patterns: Zippy treats all exclusion patterns as case-insensitive by default, meaning patterns will match files and folders regardless of letter casing. This makes pattern creation simpler and helps avoid accidental mismatches. For example, the pattern:
[readme.txt]
Will match all of the following:
readme.txtREADME.TXTReadme.TxtReadMe.txt
For more detailed examples or visual guides on exclusion patterns, you can click on Offline Guide or Online Guide buttons within the exclusion patterns dialog. The Online Guide is the most comprehensive and up-to-date resource.
Managing file extensions (text vs. binary)
Zippy distinguishes between "Text" files and "Binary" files to optimize its processing and provide the most relevant information for each type. This distinction primarily affects whether Zippy attempts to generate visual "diff" files for changes.
- Text Files: For files categorized as "Text," Zippy will, upon detecting modifications, generate visual HTML diffs (these are
.htmfiles). These diffs show side-by-side comparisons of the file's content before and after the changes, highlighting differences down to the individual character level. Common examples of files treated as text include:.txt(plain text),.html(web pages),.css(stylesheets),.js(JavaScript),.py(Python code),.md(Markdown). Text-based files exceeding 3MB in size are excluded from diff generation to ensure optimal performance. - Binary Files: For files categorized as "Binary," Zippy will still track whether they have been added, modified, or deleted. However, it will not attempt to generate visual content diffs, as comparing the byte content of most binary files in a human-readable way is often impractical or meaningless. Common examples include:
.png,.jpg(images),.exe(executables),.zip(archives),.docx(Microsoft Word documents),.pdf(Portable Document Format).
To manage and customize these file extension categorizations:
-
Access: Click the Options Menu (⠿) in the main Zippy interface and select "Manage File Extensions."
-
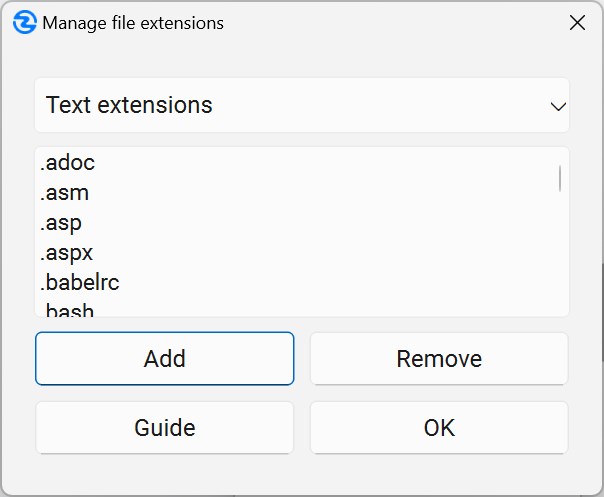
Dialog Interface: A dialog box will appear, allowing you to configure these settings:
- Category Selection: Use the dropdown menu to switch your view between the "Text" file extensions list and the "Binary" file extensions list.
- Adding/Removing Extensions: You can add new file extensions (e.g.,
.mycustomformat) to the appropriate list or remove existing ones if Zippy's default categorization doesn't suit your specific project files. - Extension Format: All extensions must start with a period (e.g.,
.txt,.log). - Mutual Exclusivity: A file extension cannot be present in both the "Text" and "Binary" lists simultaneously.
Zippy is pre-configured with a comprehensive list of common text and binary file extensions. However, the ability to customize these lists ensures that Zippy can optimally handle any unique file types specific to your projects.
License management
Zippy's license status and your subscription are managed through a combination of the in-app options and an online portal.
In-App License Actions
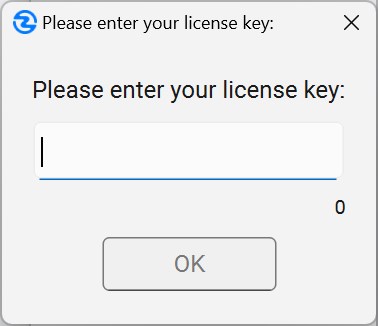
- Activation: If you have purchased a Zippy subscription, you can activate it by opening the Options Menu (⠿) and selecting "Register Zippy." Enter your license key when prompted. An active internet connection is required.
- Deactivation: To move a license to a new computer, you must first deactivate it on the old one. From the Options Menu (⠿), select "Deactivate License." This requires an internet connection and will free up an activation slot.
Managing Your Subscription and Activations Online
For all other management tasks, you will use the secure portal provided by our payment processor, PayPro Global. You can access this portal at any time by clicking the "Control panel" button in your original purchase confirmation email.
To access the Control Panel for the first time, you must click on "reset password" to create a new password for your account.
From this page, you can:
- Cancel Your Subscription: You can cancel your subscription by clicking the red "Cancel" button in your Control Panel. This action suspends the subscription, meaning it remains active until the end of the current billing cycle, after which it will not renew. You can reactivate a suspended subscription by clicking a green "Activate" button in the Control Panel, which will resume renewals.
- Update Payment Information: You can update the credit card or payment method used for your subscription renewals.
- View Invoices: You can view and download all past invoices for your records.
Periodic License Validation and Offline Usage
To ensure licenses are used correctly, your licensed copy of Zippy must periodically validate its status with our server.
- Automatic Online Check-in: Once every 30 days, Zippy performs a quick, automatic check-in with our license server.
- 14-Day Offline Grace Period: If Zippy cannot perform its check-in, your application will continue to work fully for a grace period of 14 days.
- Reversion to Trial Mode: If the application is unable to validate its license online within that 14-day grace period, it will revert to the limited Trial Mode. Your data remains safe, but you will be limited to 10 backups per project until it is re-activated. To re-activate, simply use the "Register Zippy" option again once an internet connection is available.
Understanding project versioning & data storage
Zippy's approach to versioning and data storage is designed for clarity, reliability, and user accessibility.
-
Version Numbering: Each backup (or "version") created by Zippy is assigned a unique, sequential, four-digit number (e.g.,
0001,0002, and so on). Licensed users can create up to9999versions per project. -
Dedicated Version Storage: Every version is stored in its own separate, clearly named folder within the project's
backup-zippyfolder. For instance, version0001will reside inbackup-zippy/0001/, version0002inbackup-zippy/0002/, etc. -
Concept of Full Snapshots: Each of these version folders contains a complete and independent snapshot of your project as it existed at the precise moment that backup was created. This means each version folder includes:
- A ZIP archive: This file contains all the files and folders from your
[your-project-name]-zippyworking folder (excluding any items matching your defined exclusion patterns) at the time of backup. notes.html: An HTML file that displays the descriptive notes you entered when you created that specific version.changelog.html: An HTML file providing a detailed record of what changed in that version (files added, modified, deleted). It also includes a timeline or history of all project versions up to that point.- Individual Diff Files (
.htm): For every text-based file that was modified in this version, Zippy generates a corresponding.htmfile. This HTML file presents a visual, side-by-side comparison of the changes made to that text file. For example, ifmydoc.txtwas changed, you will findmydoc.txt.htm. Zippy uses the.htmextension for these diff files (while using.htmlfor notes and changelogs) primarily to help differentiate them by file type when browsing, though both extensions are functionally interchangeable and can be opened in any standard web browser.
- A ZIP archive: This file contains all the files and folders from your
Accessing Version Information:
You can review the information associated with your backups in several ways:
- During Restore Operations: The Zippy Restore interface (as detailed in the section 'Restore Workflow') is the primary way to browse through your versions, read their associated notes, review changelogs, and directly open the visual diff files.
- Manual Browsing via File Explorer: Since Zippy stores versions in a straightforward folder structure, you can manually navigate to any specific version folder (e.g.,
backup-zippy/0015/) using your computer's file explorer. From there, you can open thenotes.html,changelog.html, or any of the.htmdiff files directly in a web browser to view their content. You can also open the ZIP archive to access the raw files.
Data Integrity and Local-First Storage:
- Integrity Checks: Zippy employs hashing mechanisms (like SHA-256) to detect even minute file changes and to verify the integrity of each backup archive immediately upon its creation.
- Strictly Local Storage: All your project files, their entire version history, and Zippy's metadata (
zippy.db) are stored locally on your computer's hard drive. Zippy operates on a local-first principle and does not rely on mandatory cloud synchronization or external servers for its core functionality or for storing your primary data. - No Vendor Lock-In: Zippy is designed with data accessibility in mind. Backup archives are standard ZIP files, and supporting documentation (notes, changelogs, diffs) are standard HTML files. This means you can access your backed-up project files and review version information directly, even if you don't have Zippy installed on a particular PC, ensuring you are never locked into using Zippy to access your own data.
Storage management and flexibility
Over time, your project's backup-zippy folder, which stores all your Zippy backup versions, can become quite large. This is especially true for projects with many backup versions or those containing large files.
Zippy allows you to manually manage this disk space by deleting individual version folders from the backup-zippy folder if you are absolutely certain you will no longer need them. For example, you could navigate to your project's main folder, then into the backup-zippy subfolder, and delete older version folders like 0001/ or 0002/.
This action will immediately free up disk space on your computer.
Important Considerations Before Deleting Backups Manually:
When manually deleting backup folders, it is crucial to understand the following:
-
Irreversible Deletion: Once a backup version's folder (e.g.,
0015/) is manually deleted from your file system, that specific version cannot be restored by Zippy. This action is permanent and Zippy has no way to recover a manually deleted folder. -
Risk of Project Errors if Done Incorrectly: Beyond simply losing the ability to restore a deleted version, deleting the wrong backup folders can lead to serious issues with your Zippy project. Specifically, it can prevent Zippy from creating any new backups for that project. This is due to how Zippy manages version numbers and interacts with its internal project database.
Understanding Zippy's Versioning to Delete Safely:
To understand why incorrect deletions are risky, here’s a brief overview:
- Unique Version Numbers & Database: Zippy assigns a unique, sequential 4-digit number to every backup it creates (e.g.,
0001,0002,0003, etc.). These numbers, along with other metadata for each backup, are recorded in a project-specific database file namedzippy.db(located in your main project folder). This database ensures that each version number that has been used is unique to that project. - New Backup Numbering Logic: When you click the "Backup" button, Zippy determines the next version number by looking at the highest numbered backup folder currently present in the
backup-zippyfolder and then increments that number (e.g., if0044/is the highest folder, the next backup will be0045). - The Conflict: If you manually delete a backup folder (say,
0045/), its folder is gone from thebackup-zippyfolder. However, thezippy.dbfile still contains a record that version0045once existed. If, after your manual deletions, the highest numbered folder remaining on disk is0044/, Zippy will calculate that the next backup to be created should be numbered0045. When Zippy attempts to create this new version0045, it will check its database. Because0045is still "known" to the database as a previously existing version, Zippy will encounter an error. It cannot create a new backup with a number that its database already has a record for. This failure will prevent further backups and will compromise your project's backup chain.
The Golden Rule for Safe Manual Deletion:
To safely delete backup folders manually and confidently avoid the risk described above, you must adhere to the following critical rule:
- Only delete backup folders whose 4-digit version number is strictly smaller than your project's Current Active Version Number.
- The "Current Active Version Number" is the version number prominently displayed in the Zippy main interface for your project (found in the bottom-right corner). This number indicates the version your current working project files are based on.
Practical Examples:
Let's assume Zippy's main interface for your project shows that your "Current Active Version Number" is 0075:
-
SAFE Deletions (What you CAN do):
- You CAN manually delete the folder
backup-zippy/0001/. - You CAN manually delete the folder
backup-zippy/0030/. - You CAN manually delete the folder
backup-zippy/0074/. - In essence: Any version folder with a number from
0001up to (and including)0074can be safely deleted in this scenario.
- You CAN manually delete the folder
-
UNSAFE Deletions (What you MUST NOT do!):
- DO NOT delete the folder
backup-zippy/0075/. (This is your current active version; its number is not smaller.) - DO NOT delete any folder with a version number higher than
0075(e.g.,0076/,0080/) if such folders exist. These folders might be from a previous line of work before you restored to version0075. Deleting them will lead to Zippy attempting to re-use one of these version numbers later, causing the conflict with the database.
- DO NOT delete the folder
Impact on Remaining Backups:
If you strictly follow the "Golden Rule" for safe manual deletion, the integrity and content of all other remaining backup versions in your backup-zippy folder will not be affected. Each Zippy backup is stored as a full, independent snapshot of your project files at that point in time (respecting exclusions). Deleting one version folder (correctly) does not corrupt the data within other, separate version folders.
Final Recommendation:
Manually deleting backup folders offers you flexibility for managing your computer's disk space, but it is an advanced operation that carries significant risks if not performed with a clear understanding of the process.
- If you are even slightly unsure or unclear about which backup folders are safe to delete based on the rule above, it is strongly recommended that you DO NOT manually delete any backup folders from the
backup-zippyfolder. - The risk of damaging your project's backup functionality (preventing new backups) outweighs the benefit of freeing up disk space if you are uncertain.
Always consider the long-term importance of your older versions carefully before deciding to permanently delete them.
Advanced features & usage
Beyond the core backup and restore functionalities, Zippy offers several advanced features and usage patterns to enhance your workflow.
Cherry-picking individual files from backups
There may be times when you don't need to restore an entire project to a previous state, but rather just retrieve a single file or a small selection of files from an older version. Zippy's transparent storage system makes this "cherry-picking" process straightforward:
- Navigate to Backup Storage: Using your computer's file explorer, navigate into your project's
backup-zippyfolder. - Select Target Version Folder: Open the subfolder corresponding to the version number from which you want to retrieve files (e.g., if you need a file from version
0015, open the0015/folder). - Access the ZIP Archive: Inside this version folder, you will find the main ZIP archive. Open this ZIP file using your system's default ZIP utility or any compatible archiving software.
- Locate and Extract Files: Browse the contents of the ZIP archive to find the specific file(s) you need.
- Copy to Working Folder: Drag and drop (or copy and paste) these desired files from the ZIP archive directly into your current working project folder (i.e., the
[your-project-name]-zippyfolder).
If you copy an older version of a file back into your active working folder in this manner, Zippy will recognize this change during its next backup operation. If the file already exists, it will be seen as modified; if it doesn't, it will be seen as a newly added file.
Using Zippy with cloud storage & portable drives
Zippy is designed primarily for local version control, but it can be effectively used in conjunction with cloud storage services and portable drives.
Cloud Storage Compatibility (e.g., Dropbox, Google Drive, OneDrive):
You can combine the robust local versioning of Zippy with the backup and synchronization capabilities of cloud storage.
Setup Instructions:
- Project Location: The key is to create your Zippy project (i.e., the parent folder where Zippy creates
[your-project-name]-zippyandbackup-zippy) inside your cloud provider's local synchronization folder. - Crucial - Ensure Offline Availability: This is a critical requirement. You must configure your cloud storage application (e.g., Dropbox client, Google Drive for Desktop) to ensure that the Zippy project folder, including its
[your-project-name]-zippysubfolder, thebackup-zippysubfolder, and thezippy.dbfile, are always fully available offline on your computer. If files are set to "online-only" or "on-demand," Zippy will not be able to scan them correctly and is likely to malfunction or freeze. - Normal Operation: Once set up, you use Zippy locally as you normally would. Zippy performs all its operations (scanning, zipping, database updates) on the local files. Your cloud storage service will then automatically detect these local changes and sync the
[your-project-name]-zippyfolder, thebackup-zippyfolder (with all its versioned content), and thezippy.dbfile to the cloud.
Cross-PC Workflow with Cloud Sync:
If you use the same cloud storage service on multiple computers (e.g., a desktop and a laptop) and ensure that the Zippy project files are fully synced and available offline on all PCs, you can work on your Zippy project from different computers. Your Zippy version history, managed by the zippy.db file and the backup-zippy contents, will stay synchronized via your cloud provider. (It's generally advisable to ensure you are running identical versions of Zippy on all PCs involved).
Using Zippy with Portable Drives (USB Drives, External Hard Drives):
For offline portability or to work on your project on different computers that may not share cloud access:
-
Copy Entire Project Structure: Simply copy the entire main Zippy project folder from your computer to the USB drive or external hard drive. This folder must include:
- The
[your-project-name]-zippyworking folder. - The
backup-zippyfolder (containing all backups). - The
zippy.dbdatabase file. - The
Zippyshortcut.
- The
-
Working from the Portable Drive: If Zippy is installed on the target computer where you've connected the portable drive, you can open the project directly from the drive. You can do this by navigating to the project's folder on the USB drive, and double-clicking the
Zippyshortcut. You can then continue working with your full version history intact. Remember to safely eject the drive when finished.
Handling empty folders
A key aspect of Zippy's operation is that it tracks and versions files. Consequently, empty folders (folders that contain no files) will not be included in backups. This means that if you have an empty folder in your [your-project-name]-zippy working folder, it won't be recreated if you restore a version that technically should have had that empty folder.
Workaround for Preserving Empty Folder Structures: If you need to ensure that a specific folder structure is preserved by Zippy, even if some folders within that structure are temporarily empty, you can use a simple workaround:
- Place a placeholder file inside any folder that you want Zippy to explicitly track and include in backups.
- This placeholder can be a very small, empty file. For example, you could create an empty text file named
_keep.txt, or any other innocuous name.
By ensuring every folder you care about contains at least one file (even a placeholder), you can make Zippy preserve your desired folder hierarchy through backup and restore cycles.
Tips and best practices
To maximize the benefits of Zippy and maintain an efficient and reliable versioning workflow, consider the following tips and best practices.
Optimizing your workflow
- Backup Regularly and Meaningfully: Create backups frequently, especially after completing significant milestones, before making potentially risky changes, or at the end of a work session. Don't just back up randomly; back up when you've reached a coherent state worth preserving.
- Write Descriptive and Clear Version Notes: The notes you attach to each backup are invaluable. Write notes that clearly describe the changes made, the reason for the changes, or the state of the project in that version. Good notes will save you a lot of time when you later need to find a specific version. Think about what your future self (or a colleague) would need to know.
- Always Close Project Files Before Restoring: This is a critical step. Before initiating a restore operation, ensure that all files from your Zippy project folder (
[your-project-name]-zippy) are closed in any other applications (text editors, IDEs, image viewers, etc.). Open files are often locked by the operating system, which can prevent Zippy from deleting or overwriting them, leading to restore failures. - Utilize Exclusion Patterns Strategically: Make effective use of exclusion patterns (see the section 'Managing Exclusion Patterns') from the outset of your project. Exclude files and folders that don't need to be versioned, such as temporary files, build outputs, compiled binaries, large static assets that don't change, or user-specific IDE settings. This keeps your backups smaller, faster, and more focused on your actual work.
Text vs. binary file configuration
Take a moment to review and, if necessary, customize Zippy's file extension lists for "Text" and "Binary" files (see the section 'Managing File Extensions (Text vs. Binary)'). This configuration directly impacts whether Zippy generates useful visual diffs.
Backup naming & identification
While Zippy automatically names backup folders sequentially (e.g., 0001, 0002), and uses timestamps, the version notes you provide are the primary human-readable identifier for your backups. Zippy uses a 'slugified' (URL-friendly) version of your notes when naming backup folders. This further underscores the importance of writing consistent, descriptive notes to help you quickly identify and understand the content of different versions when browsing your project's history.
Troubleshooting & support
Even with intuitive software, you might occasionally encounter issues or have questions. This section covers common troubleshooting scenarios and how to seek further support.
Common issues and solutions
-
Issue: Files Not Being Backed Up / Changes Not Detected.
- Solution 1 (Check Exclusions): Carefully review your project's exclusion patterns (see the section 'Managing Exclusion Patterns'). It's possible the files or folders in question are being unintentionally excluded. Remember that exclusion patterns are immutable once set.
- Solution 2 (Verify Location): Ensure the files you expect to be backed up are located inside the correct Zippy working folder (i.e., the
[your-project-name]-zippyfolder). Zippy only monitors and backs up content within this specific folder. - Solution 3 (Save Files): Make sure you have saved all changes to your files in their respective applications (e.g., text editor, IDE) before clicking the "Backup" button in Zippy. Zippy backs up the files as they exist on disk.
-
Issue: Restore Operation Fails.
- Solution 1 (Close All Project Files): This is the most common cause of restore failures. Ensure that absolutely all files and folders within your
[your-project-name]-zippyfolder are closed in all other applications. Files locked by other programs cannot be deleted or overwritten by Zippy. - Solution 2 (Check Disk Space): Verify that you have sufficient free disk space on the drive where your project is located (see the section 'Disk Space Considerations' for estimates). Restoring requires temporary space.
- Solution 3 (Review Recovery Options): If Zippy's automatic recovery mechanism (see the section 'Recovery Process (After Failed Restore)') also fails, look for a manually recoverable backup file (e.g.,
manual-recovery-...zip) in your project'sbackup-zippyfolder. You may need to manually extract its contents.
- Solution 1 (Close All Project Files): This is the most common cause of restore failures. Ensure that absolutely all files and folders within your
-
Issue: License Validation Fails (During Activation or Deactivation).
- Solution 1 (Check Internet Connection): Zippy requires an active internet connection to communicate with its activation server for both activating and deactivating licenses. Ensure your internet is working.
- Solution 2 (Verify License Key): Double-check that you have entered the license key correctly, without any typos or extra spaces.
- Solution 3 (Firewall/Antivirus): Occasionally, firewall or antivirus software might block Zippy's connection to the activation server. Temporarily disabling them (if safe to do so) or adding an exception for Zippy might help diagnose this.
- Solution 4 (Contact Support): If you are certain your key is valid and your internet is working, but activation still fails, contact Zippy support for assistance.
-
Issue: Unexpected Changes Not Detected or Files Incorrectly Identified as Unchanged.
- Solution 1 (Save All Files): As mentioned above, always save your work in other applications before initiating a Zippy backup.
- Solution 2 (Application Behavior): Some applications might use complex saving mechanisms, create temporary or swap files, or only write final changes upon closing. If a file appears unchanged to Zippy, ensure the application has fully committed its changes to the disk version of the file that Zippy is monitoring.
- Solution 3 (Exclusion of Temp Files): Ensure that temporary files created by your applications (which might hold intermediate changes) are appropriately excluded if they are interfering with Zippy's change detection for the main files.
Disk space considerations
Zippy operations, particularly backup and restore, require a certain amount of free disk space to function correctly. While Zippy may perform checks, it's good to be aware of the general requirements:
-
For Creating Backups: You will typically need free disk space equivalent to approximately 2 times the size of your project folder (
[your-project-name]-zippy). This accounts for space needed to create the new ZIP archive and for any temporary processing or staging Zippy might do. -
For Restoring Versions: Restoring can be more disk-intensive. You may need free disk space of roughly 3 times the size of the ZIP file of the version being restored. This is because Zippy:
- Creates a temporary safety backup of your current project state.
- Needs space to extract the contents of the selected backup version's ZIP file.
- May require additional working space during the process.
If you are working with very large projects, ensure you have adequate free disk space before performing these operations to avoid failures.
Further help & support
If this user guide does not address your specific issue or question, Zippy provides other avenues for assistance:
- Online User Guide: For the most current and potentially more detailed documentation, including visual examples or updated FAQs, access the "Online User Guide" option from Zippy's main Options Menu (⠿).
- Report a Bug: If you believe you have encountered a software bug or defect in Zippy, use the "Report a Bug" option, found in the Options Menu. Provide as much detail as possible about the issue and the steps to reproduce it.
- Contact Zippy Support: Assistance for specific issues is available by submitting a request through the contact form at
zippy.zip/contact.
Zippy trial vs. licensed version
Zippy is offered in two versions:
-
Trial Version:
- Cost: Free to download and use.
- Project Limit: Allows an unlimited number of projects.
- Backup Limit: Each project is limited to a maximum of 10 backups.
- Purpose: Ideal for evaluating Zippy's full capabilities before committing to a subscription.
-
Licensed Version (Subscription):
- Cost: Requires an active, paid subscription plan.
- Benefits: Your Zippy subscription includes usage of the software for the duration of your plan, installation on the number of PCs specified in your plan, access to all version updates and new features as they are released, and the capacity for 9999 backups per project, with support for unlimited projects on each licensed computer.
The functionality related to versioning, data integrity, and workflow is identical between the trial and licensed versions. The primary differentiator is the number of backups allowed per project, making the licensed version suitable for ongoing, professional use.
Frequently asked questions (FAQ)
-
Q: What's included in my Zippy subscription?
- A: Your Zippy subscription includes usage of the software for the duration of your plan, installation on the number of PCs specified in your plan, access to all version updates and new features as they are released, and the capacity for 9999 backups per project, with support for unlimited projects on each licensed computer.
-
Q: How many computers can I install Zippy on?
- A: The number of computers you can install Zippy on depends on the subscription plan you choose. Each plan allows installation on a specific number of PCs. Please review the features of each plan on our pricing page to determine which best suits your needs.
-
Q: How do I activate or deactivate my Zippy license?
- A: To activate your license, open Zippy, click the options menu (⠿), and select 'Register Zippy.' Enter your license key when prompted. An active Internet connection is required. To deactivate, follow the same path but select 'Deactivate License.' Upon deactivation, the application reverts to Trial mode.
-
Q: What payment methods do you accept?
- A: We accept all major credit and debit cards and PayPal. All transactions are securely processed. All payment processing is handled by PayPro Global, which ensures bank-level encryption and advanced fraud detection. No sensitive payment information is ever stored on Zippy's servers.
-
Q: What is your refund policy?
- A: We offer a 14-day money-back guarantee for the first month of any new subscription. We encourage you to first evaluate the free trial version. To request a refund, you must first cancel your active subscription via your PayPro Global Control Panel, which is accessible from your original payment confirmation email. Once cancelled, submit a formal request at zippy.zip/contact, selecting 'Refund Request' as the category. Refunds will be processed within five (5) business days.
-
Q: How do I cancel my subscription?
- A: You can manage your subscription from your PayPro Global Control Panel, accessible via the 'Control panel' link in your original payment confirmation email. To cancel your subscription, click the red "Cancel" button in your Control Panel. This action suspends the subscription, meaning it remains active until the end of the current billing cycle, after which it will not renew. You can reactivate a suspended subscription by clicking a green "Activate" button in the Control Panel, which will resume renewals.
-
Q: Can I transfer my license to a new computer?
- A: Yes. The primary method to free up an activation slot is to deactivate from within the Zippy application while connected to the internet. In rare cases where you deactivate or uninstall Zippy while offline, the activation slot is not freed up on the server. For these specific situations, you can contact support once per year, and our team will either manually deactivate the lost slot or add an additional activation slot to the license as compensation. Afterwards, you can use the same license key to activate the software on your new computer.
-
Q: Do I need to be online to use Zippy?
- A: Zippy works completely offline for all core functions. An internet connection is required only for: 1) one-time license activation or deactivation, and 2) a periodic license validation check that occurs automatically every 30 days. If a validation check is missed, a 14-day grace period begins, during which the software remains fully functional. You must connect to the internet once during this grace period to re-validate. If not, the software reverts to Trial mode.
-
Q: How do I get an invoice for my purchase?
- A: After purchase, you will receive a payment confirmation email with a direct 'Download invoice' link. You can also download invoices at any time from your PayPro Global Control Panel.
-
Q: Can I change my plan or add more PCs?
- A: Yes. To change plans, you must click the "Cancel" button on your current plan in the Control Panel and then purchase a new plan.
Thank you for choosing Zippy! We are confident that this guide will empower you to harness the full potential of Zippy's features, ensuring your valuable work is always protected, meticulously versioned, and easily manageable.